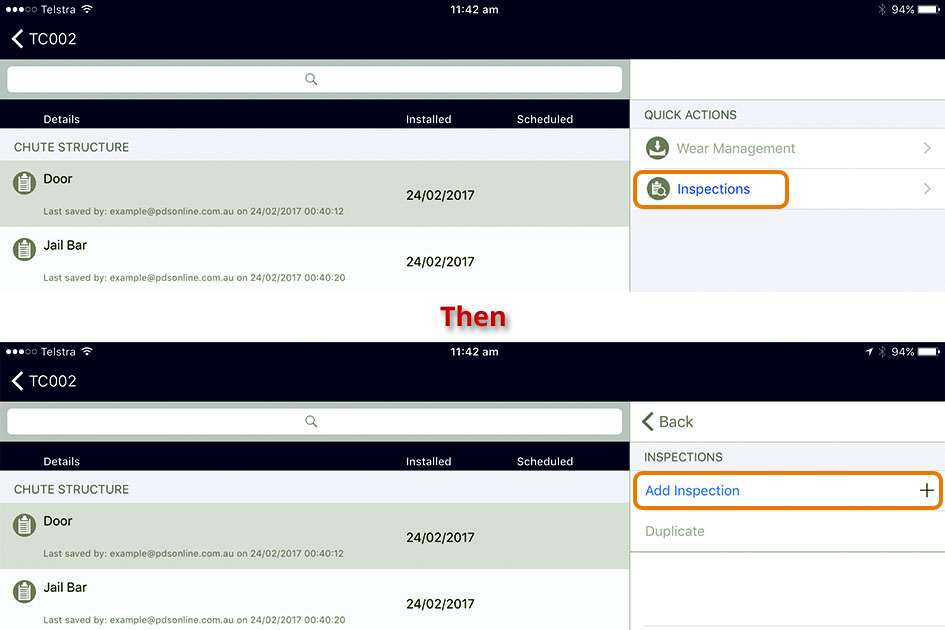
Select Associated Equipment in the Quick Actions menu. Tap on the Equipment type to be inspected, then on Inspections, which has now been activated. Select Add Inspection + in the Inspections panel.

There are three options to choose from on the Add Inspection Pop-up.
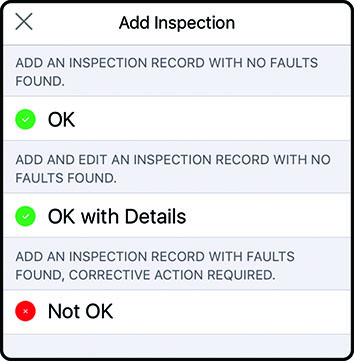
Tapping on OK will save a good condition report with the date of the inspection. Tapping on OK with Details allows comments to be added and photos can be attached.
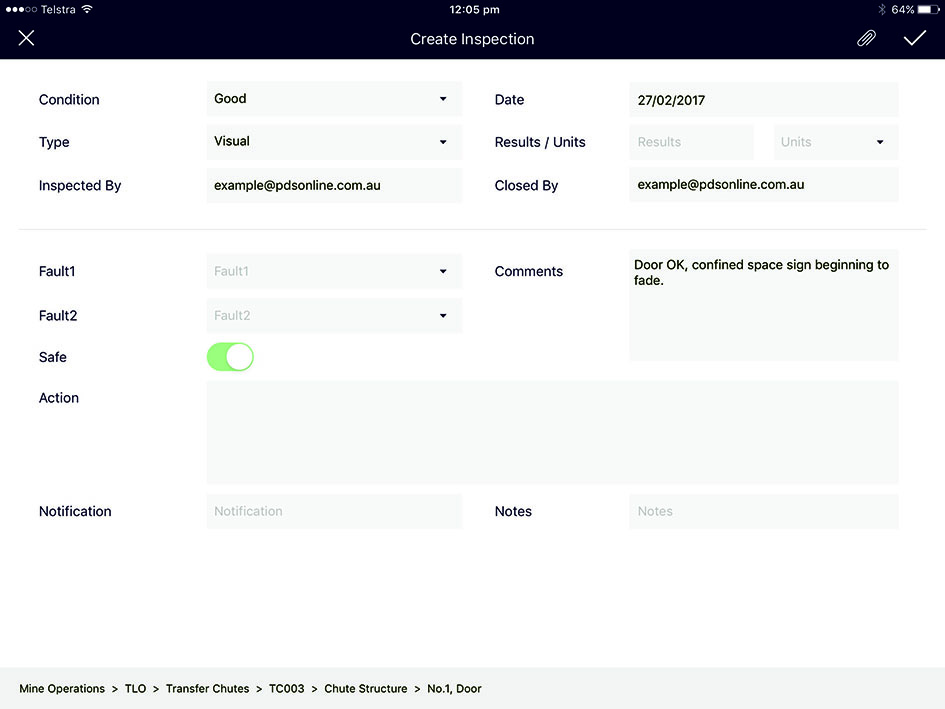
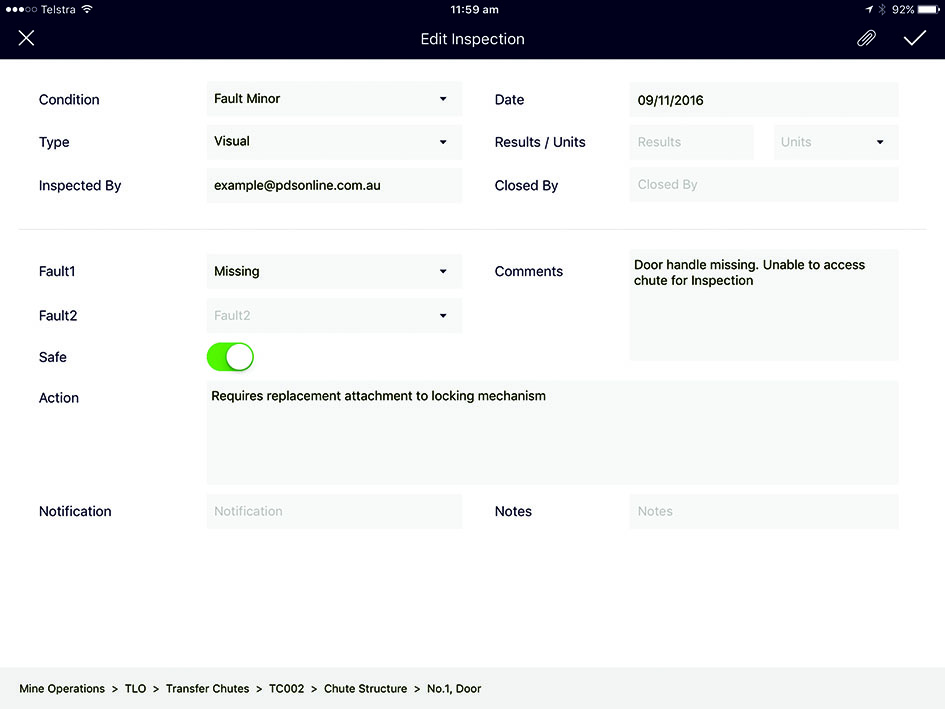
Tapping on Not OK allows condition, results, fault codes, photo attachments, comments and actions to be saved as an inspection record. All boxes with the drop down arrow need to be configured in the Web Version. To add information to text fields, tap on the field and type in text. It is mandatory to add a fault code from the drop downs to create the record. Also next to Safe, the At Risk toggle is set as green as a default. Tap on it to change it to red if the issue renders the equipment at risk. Once completed select the Tick to save.
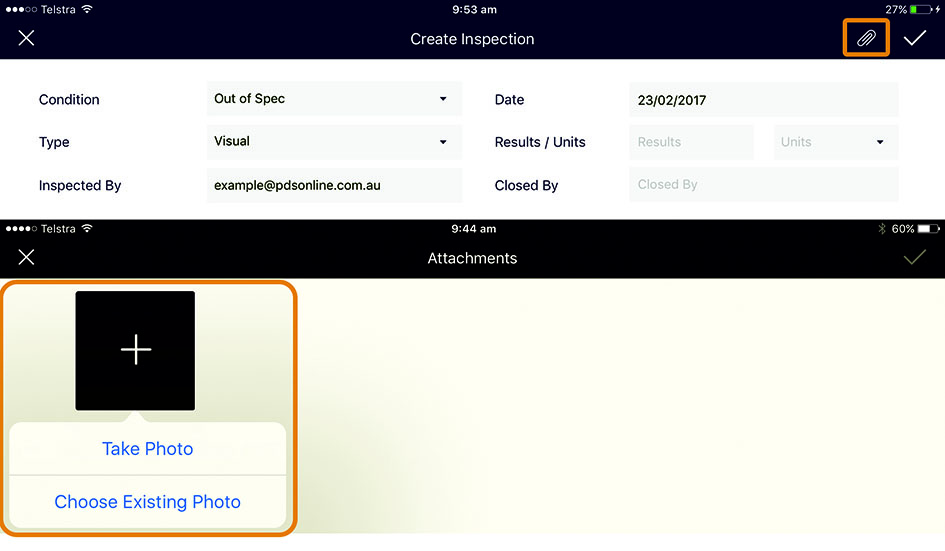
On the either the Create or Edit Inspection screen, select the Paper clip icon on the top left. Tap on the + and select Take Photo. Once photo is captured, either Use Photo or retake if required. Select the Tick to save.